Kubernetes Multi-Cloud Cluster
You will learn about how to set up a multi-cloud Kubernetes cluster. We will have 3 worker nodes each on AWS, GCP, and localhost with 1 master node on AWS.

Architecture:

Control Plane:
- We will have a control plane on the AWS instance and we will also configure it as a client.
- It’s advised to have a minimum of 4 Gb RAM and 2 vCPU on the master node, with 30 GB EBS storage. It will work with 1 vCPU and 1 Gb RAM but it might cause some error sometimes.
Worker Node:
- We will have 3 worker node each on AWS, GCP, and localhost RHELv8 VM.
- The configuration of all the worker nodes is the same, it may only differ while installing docker on the system. In AWS we will use Amazon Linux 2 image, it already has yum configured for docker, whereas in GCP, we will use the CentOS 8 image, here we need to make the yum repository because it doesn’t come with the docker package, the same goes with the RHELv8.
Control Node Configuration:
Installing Docker
yum install docker -y
systemctl enable docker — now
Configuring Kubernetes yum repository
cat <<EOF > /etc/yum.repos.d/kubernetes.repo
[kubernetes]
name=Kubernetes
baseurl=https://packages.cloud.google.com/yum/repos/kubernetes-el7-x86_64
enabled=1
gpgcheck=1
repo_gpgcheck=1
gpgkey=https://packages.cloud.google.com/yum/doc/yum-key.gpg https://packages.cloud.google.com/yum/doc/rpm-package-key.gpg
EOF
Installing kubelet, kubeadm, and kubectl
yum install -y kubelet kubeadm kubectl — disableexcludes=kubernetes

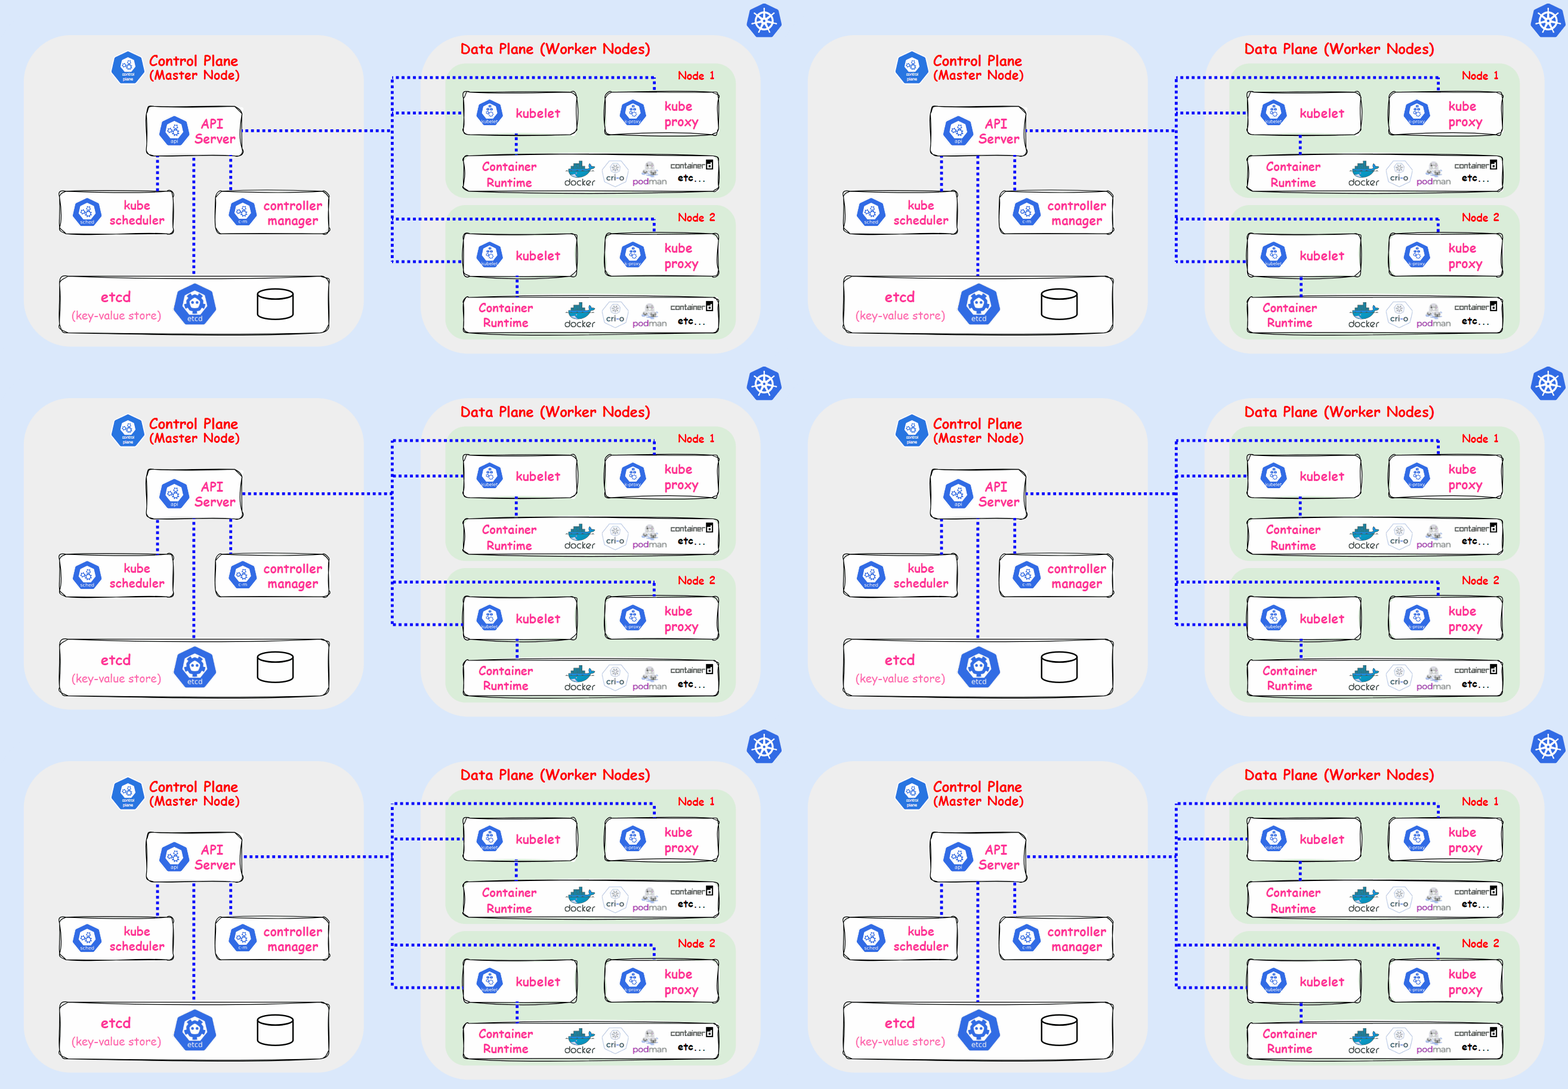
While seeing the architecture of the Kubernetes, we can see that we need to have some pods being launched like scheduler, etcd, controller management, API server. These are needed to be installed and are set up using the networking. So, we will make use of kubeadm to do that, therefore we need to install kubeadm, kubelet, and kubectl for Kubernetes client.
Configuring cgroup of docker
cat > /etc/docker/daemon.json
{ “exec-opts”: [“native.cgroupdriver=systemd”] }
Kubernetes only support systemd as the cgroup driver, so we need to configure it by making this daemon.json file. Now, we need to restart the docker service because we have made changes in the configuration of the docker.
systemctl restart docker
Now, we need to start the kubelet.
systemctl enable — now kubelet
Pulling the necessary images
kubeadm config images pull
We need to pull this to set up the cluster control node with the necessary pods.
Installing iproute-tc
yum install iproute-tc
We need to install this for some software that will help with the internal networking for the control node.
Setting up cluster
kubeadm init — control-plane-endpoint “PUBLIC-IP:PORT” — pod-network-cidr=10.244.0.0/16 — ignore-preflight-errors=NumCPU — ignore-preflight-errors=Mem
This will finally set up the control plane with all the necessary pods and networking except one we will install. Finally, you will see the output as:

Configuring client on the master node
mkdir -p $HOME/.kube
sudo cp -i /etc/kubernetes/admin.conf $HOME/.kube/config
sudo chown $(id -u):$(id -g) $HOME/.kube/config
This will basically transfer the kubernetes conf file to the home directory so that it can also be the client system.
Installing flannel for network peering support
kubectl apply -f https://raw.githubusercontent.com/coreos/flannel/master/Documentation/kube-flannel.yml
Worker Node Configuration
We have to turn off the swap in all the worker nodes:
swapoff -a
The only difference we will be having in nodes is the installation of docker. In AWS we will run:
yum install docker -y
systemctl enable docker — now
In GCP CentOS 8:
cat > /etc/yum.repo.d/docker-ce.repo
[docker-ce]
baseurl=http://docker-release-yellow-prod.s3-website-us-east-1.amazonaws.com/linux/centos/8/x86_64/stable/
gpgcheck=0
enabled=1
yum install docker-ce -y — nobest
systemctl enable docker — now
In RHELv8:
cat > /etc/yum.repo.d/docker-ce.repo
[docker]
name=Docker
enabled=1
baseurl=https://download.docker.com/linux/centos/7/x86_64/stable/
gpgcheck=0
yum install docker-ce -y — nobest
systemctl enable docker — now
Configuring Kubernetes yum repository
cat <<EOF > /etc/yum.repos.d/kubernetes.repo
[kubernetes]
name=Kubernetes
baseurl=https://packages.cloud.google.com/yum/repos/kubernetes-el7-x86_64
enabled=1
gpgcheck=1
repo_gpgcheck=1
gpgkey=https://packages.cloud.google.com/yum/doc/yum-key.gpg https://packages.cloud.google.com/yum/doc/rpm-package-key.gpg
EOF
Installing necessary software
yum install -y kubelet kubeadm kubectl — disableexcludes=kubernetes
systemctl enable — now kubelet
Configuring cgroup of docker
cat > /etc/docker/daemon.json
{ “exec-opts”: [“native.cgroupdriver=systemd”] }
systemctl restart docker
Installing iproute-tc
yum install iproute-tc
Now, we need to make some configuration here after installing this, if we won’t do this we will be stuck in the installation process.
cat <<EOF | sudo tee /etc/sysctl.d/k8s.conf
net.bridge.bridge-nf-call-ip6tables = 1
net.bridge.bridge-nf-call-iptables = 1
EOF
Take the join command from the master node
We can either use the following command or copy from the output after the installation process.
kubeadm token create — print-join-command

Joining the worker node to the master using the join command.

Seeing this confirms that the worker node has successfully joined the cluster.
Finally, from the master node, we will check that how many nodes are connected successfully and ready to use.


So, we have successfully created the multi-cloud Kubernetes cluster.


